6. Maintaining and Protecting the Song Meter Mini Bat 2
Update the Recorder's Firmware
We regularly publish new firmware versions that improve the functionality of the Song Meter Mini Bat 2. If your recorder is running an outdated version of the firmware, the Status Screen in the Song Meter Configurator app will display a message alerting you to the new version. We recommend making sure your recorder is on the latest firmware at the start of each deployment.
Updating the firmware requires downloading the latest firmware file from our Downloads page at wildlifeacoustics.com/account/downloads. The file must be saved to an SD card. A single SD card can be used to update multiple recorders.
Once the firmware is updated, it is not necessary to keep the firmware file on an SD card installed in the recorder.
Update Firmware Using the Song Meter Configurator App
When paired with a Song Meter Mini Bat 2, you can use the Song Meter Configurator app to initiate a firmware update.
This procedure loads a configuration file (ending in .miniconfig) and/or firmware file (ending in .smm), from the SD card to the recorder. If there are both a configuration file and firmware file on the card, the configuration file will be loaded first, and then the firmware update will be loaded.
Install brand-new or freshly charged batteries into the Song Meter Mini Bat 2.
Save the latest firmware file to an SD card:
Download the current version firmware file from our Downloads page at wildlifeacoustics.com/account/downloads.
The firmware file name is formatted as
sys-X.Y.smm.Note
You must have a user account on wildlifeacoustics.com to access our Downloads page. Only an email address is required to create a user account.
Connect an SD card to your computer.
If your computer does not have a built-in SD card slot, use a USB SD card reader or similar accessory.
Copy the firmware file to the top level of the SD card.
"Top level" means the firmware file must not be inside a folder on the card.
There must be only one firmware file on the card.
Eject the SD card from your computer's operating system before physically removing the card.
Insert the SD card into the Song Meter Mini Bat 2's SD card slot.
In the Song Meter Configurator app, open the Utilities menu:
Pair the Recorder with the Song Meter Configurator App.
Configure and Unpair icons will appear next to the recorder's name.
Tap the Configure icon for the paired Song Meter Mini Bat 2 in the Recorders screen.
Tap the Utilities icon in the upper-right corner of the Configuration Editor.
In the Utilities menu, tap Load firmware or a configuration from card.
A confirmation message will ask if you are sure you want to proceed.
Tap PROCEED to start the update.
An Updating... activity indicator will appear.
The Song Meter Mini Bat 2 will unpair from the Song Meter Configurator app.
The app will return to the Recorders screen.
Tap the Status icon next to the recorder name to open the screen.
Confirm that the FIRMWARE VERSION listed on the Status screen is the latest version.
Update Firmware Using the Physical Controls
The procedure below allows you to update a recorder from a firmware file stored on an SD card using only the button and LEDs. You can also initiate a firmware update using the Song Meter Configurator app (see Load a Configuration to a Paired Recorder from an SD Card).
This procedure loads a configuration file (ending in .miniconfig) and/or firmware file (ending in .smm), from the SD card to the recorder. If there are both a configuration file and firmware file on the card, the configuration file will be loaded first, and then the firmware update will be loaded.
Save the latest firmware file to an SD card:
Download the current version firmware file from our Downloads page at wildlifeacoustics.com/account/downloads.
The firmware file name is formatted as
sys-X.Y.smm.Note
You must have a user account on wildlifeacoustics.com to access our Downloads page. Only an email address is required to create a user account.
Connect an SD card to your computer.
If your computer does not have a built-in SD card slot, use a USB SD card reader or similar accessory.
Copy the firmware file to the top level of the SD card.
"Top level" means the firmware file must not be inside a folder on the card.
There must be only one firmware file on the card.
Eject the SD card from your computer's operating system before physically removing the card.
Install brand-new or freshly charged batteries into the Song Meter Mini Bat 2.
Insert the SD card into the Song Meter Mini Bat 2's SD card slot.
In the Song Meter Configurator app, open the Utilities menu:
Pair the Recorder with the Song Meter Configurator App.
Configure and Unpair icons will appear next to the recorder's name.
Tap the Configure icon for the paired Song Meter Mini Bat 2 in the Recorders screen.
Tap the Utilities icon in the upper-right corner of the Configuration Editor.
In the Utilities menu, tap Load firmware or a configuration from card.
A confirmation message will ask if you are sure you want to proceed.
Tap PROCEED to start the update.
An Updating... activity indicator will appear.
The Song Meter Mini Bat 2 will unpair from the Song Meter Configurator app.
The app will return to the Recorders screen.
Tap the Status icon next to the recorder name to open the screen.
Confirm that the FIRMWARE VERSION listed on the Status screen is the latest version.
If the firmware update operation is not successful, all four LEDs will blink red six times. If this happens, reformat the SD card, then repeat the above steps. See Format the SD Card.
Firmware Compatibility
The Song Meter Mini family of recorders and Song Meter Micro family of recorders require different firmware files.
All recorders in the Song Meter Mini family can be updated using a firmware file with the name format sys-X.Y.smm. These include:
Song Meter Mini 2
Song Meter Mini Bat 2
First-generation Song Meter Mini
First-generation Song Meter Mini Bat
Recorders in the Song Meter Micro family can be updated using a firmware file with the name format sysmicro-X.Y.smm. These include:
Song Meter Micro 2
First-generation Song Meter Micro
Testing Microphone Sensitivity
The Song Meter Configurator app includes a utility that can be used to test the sensitivity of a paired recorder's installed microphones.
It displays real-time measurements of the volume of each microphone's incoming signal in decibels relative to full scale (dBFS). When paired with a calibrated signal generator, this provides a simple and objective measurement of the microphone's sensitivity at one frequency.
If the optional acoustic microphone is installed, readings for both microphones will be displayed side-by-side. The ultrasonic microphone is displayed as the Left microphone, and the acoustic microphone is displayed as the Right microphone. Ultrasonic and acoustic microphones require different equipment in order to test sensitivity. See Test the Ultrasonic Microphone and Test the Acoustic Microphone for each microphone's test procedure.
Important
In order to test a microphone's sensitivity, it is necessary to have a signal generator that produces a sound at a known frequency and amplitude, a fixed distance from the microphone. Without a consistent reference sound source, the Test Microphone readout does not provide a useful measurement of microphone sensitivity.
Test the Ultrasonic Microphone
The sensitivity of the ultrasonic microphone can be measured to test its functionality. The Test microphone readout measures the volume of the incoming signal from the ultrasonic microphone with a bandpass filter applied at 40 kHz. This readout is designed for use with the Wildlife Acoustics Ultrasonic Calibrator.
The Ultrasonic Calibrator has two modes of operation:
: Calibration mode is used to test the microphone sensitivity at close range.
: Chirp mode is used to test the entire system at a distance. In Chirp mode, the Ultrasonic Calibrator emits loud, 40 kHz pulses to simulate a nearby bat. This mode can be used to verify that the recorder is triggering and generating recordings as expected.
Calibration Mode: Sensitivity Testing
In the Song Meter Configurator app, open the Utilities menu:
Pair the Recorder with the Song Meter Configurator App.
Configure and Unpair icons will appear next to the recorder's name.
Tap the Configure icon for the paired Song Meter Mini Bat 2 in the Recorders screen.
Tap the Utilities icon in the upper-right corner of the Configuration Editor.
In the Utilities menu, tap Test microphone.
Close the lid of the Song Meter Mini Bat 2.
Turn on the Ultrasonic Calibrator and toggle the mode switch to .
Position the back of the Song Meter Mini Bat 2 against the front face of the Ultrasonic Calibrator.
The left edge of the recorder should be touching the calibrator's two toggle switches, and the ultrasonic microphone should be centered over the calibrator's speaker grate.
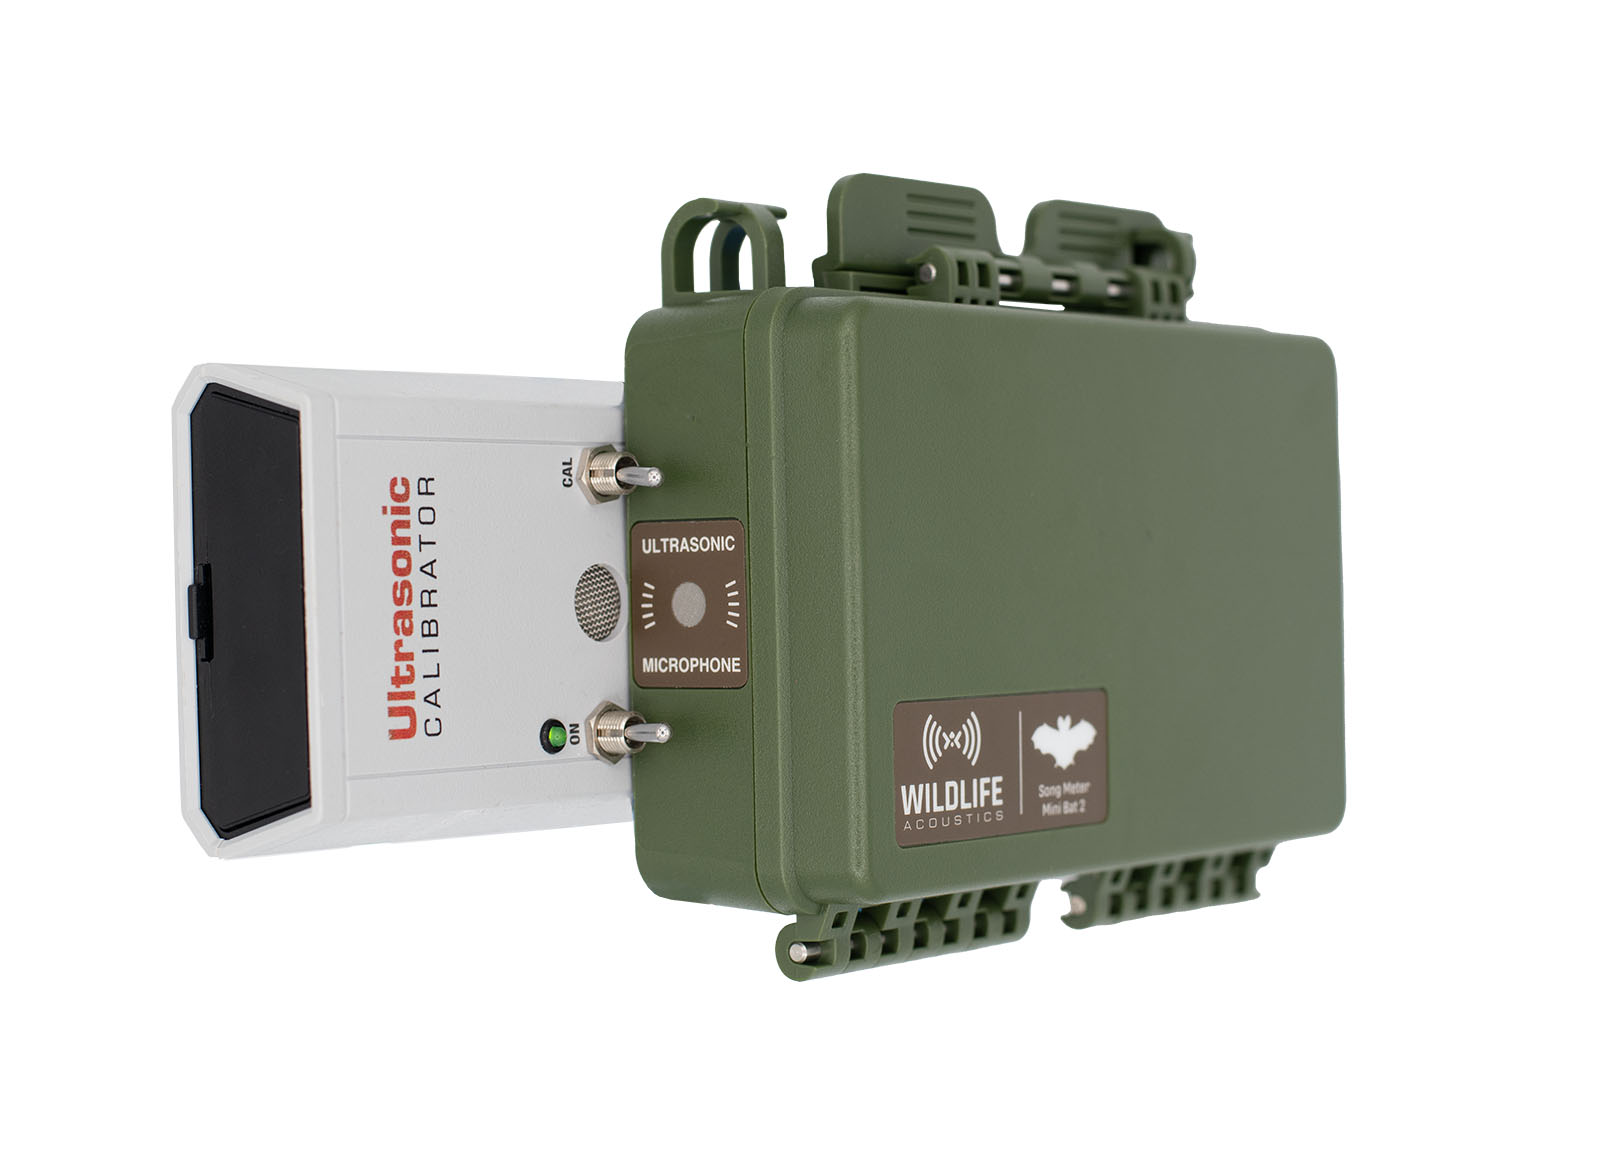
Observe the amplitude reading in the Test microphone window. If the value is higher than -32 dB, the microphone has passed and is ready to use. If the value is lower, the microphone has lost some or all of its sensitivity and should be replaced.
dBFS readings in the Test microphone window are negative numbers, so a "higher" value than -32 dB is one that is closer to 0 dB. For example, a reading of -20 dB would pass, while a reading of -40 dB would fail.

Chirp Mode: System Testing
This method of testing does not use the Test microphone window at all, and it is not intended to give a precise measurement of microphone sensitivity. Instead, it involves generating loud, ultrasonic chirps that superficially resemble those produced by a bat. When the Song Meter Mini Bat 2 is set up for triggered, ultrasonic recording, these ultrasonic chirps should trigger the recorder to begin recording and save the resulting files to its SD card. This can be useful if the Song Meter Mini Bat 2 is mounted out of reach.
Danger
Do not place the Ultrasonic Calibrator near your ears! In mode, the calibrator emits a 40 kHz signal at over 100 dB SPL. Prolonged exposure to high-intensity ultrasonic signals may cause permanent hearing loss at audible frequencies.
Program the Song Meter Mini Bat 2 with a recording schedule that will have the recorder awake and running an ultrasonic recording period during the test.
Place the recorder no more than 20 m (65 ft) away from the Ultrasonic Calibrator.
If the Ultrasonic Calibrator is held very close to the microphone, the calibrator signal may be too loud for the Song Meter Mini Bat 2 to record correctly. The recorded signal will be distorted, and artificial harmonics will be present in the resulting recording.
Set the calibrator's mode switch to .
The calibrator emits a 100 ms, 40 kHz (± 10 Hz) tone every 500 ms. The amplitude of the tone is 104 dB SPL (± 3 dB) at 10 cm.
Observe the Status screen for the paired recorder. As the recorder saves audio files to the SD card, the RECORDINGS tally will increase. Depending on the recorder's Maximum Recording Length setting, it may take up to a minute for the RECORDINGS tally to increase.
If you view the recordings in a spectrogram viewer like Kaleidoscope Pro Sound Analysis software, you should see periodic pulses at 40 kHz.
Test the Acoustic Microphone
The sensitivity of the acoustic microphone can be measured to test its functionality. The Test microphone readout measures the volume of the incoming signal from the acoustic microphone with a bandpass filter applied at 1 kHz. This readout is designed for use with a standard microphone calibrator.
A standard microphone calibrator will produce a 1 Pa / 94dB SPL, 1 kHz tone at a fixed distance from the microphone. The calibrator must be compatible with 0.5′′ diameter microphones.
Important
This procedure is only valid for third-party microphone calibrators that emit a calibrated, 1.0 kHz sine wave at a volume of 94 dB SPL.
In the Song Meter Configurator app, open the Utilities menu:
Pair the Recorder with the Song Meter Configurator App.
Configure and Unpair icons will appear next to the recorder's name.
Tap the Configure icon for the paired Song Meter Mini Bat 2 in the Recorders screen.
Tap the Utilities icon in the upper-right corner of the Configuration Editor.
In the Utilities menu, tap Test microphone.
Close the lid of the Song Meter Mini Bat 2.
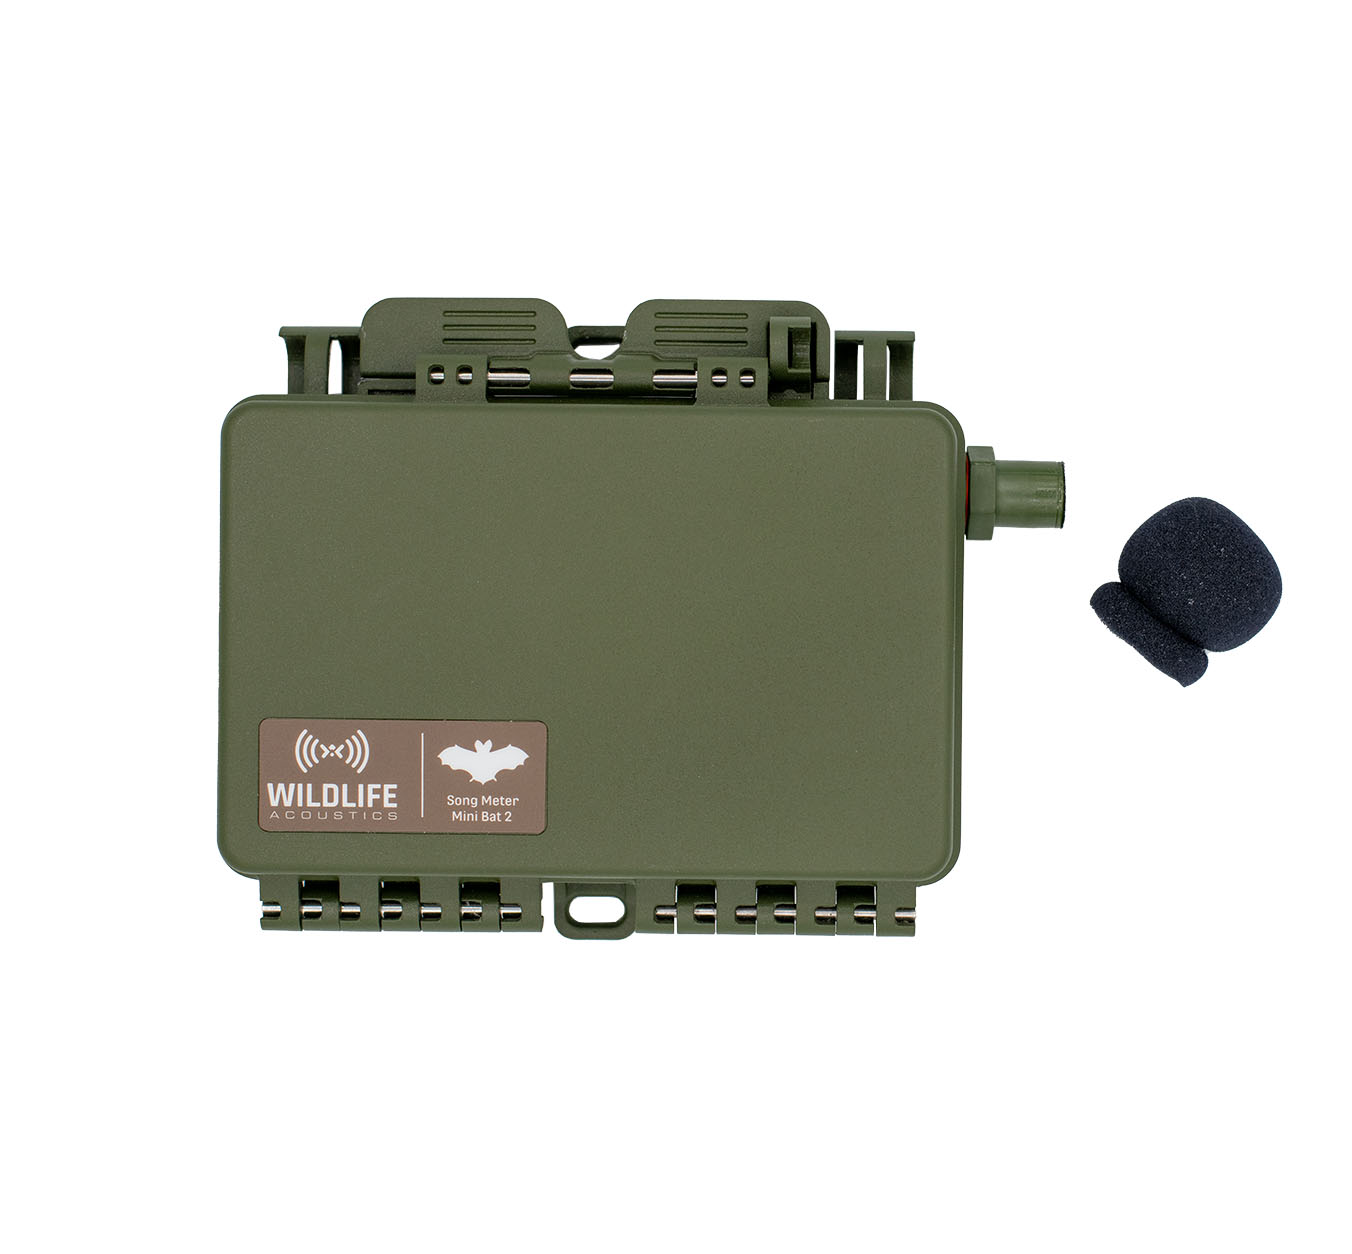
Remove the foam windscreen from the acoustic microphone.
Connect the calibrator to the acoustic microphone according to the calibrator's instructions.
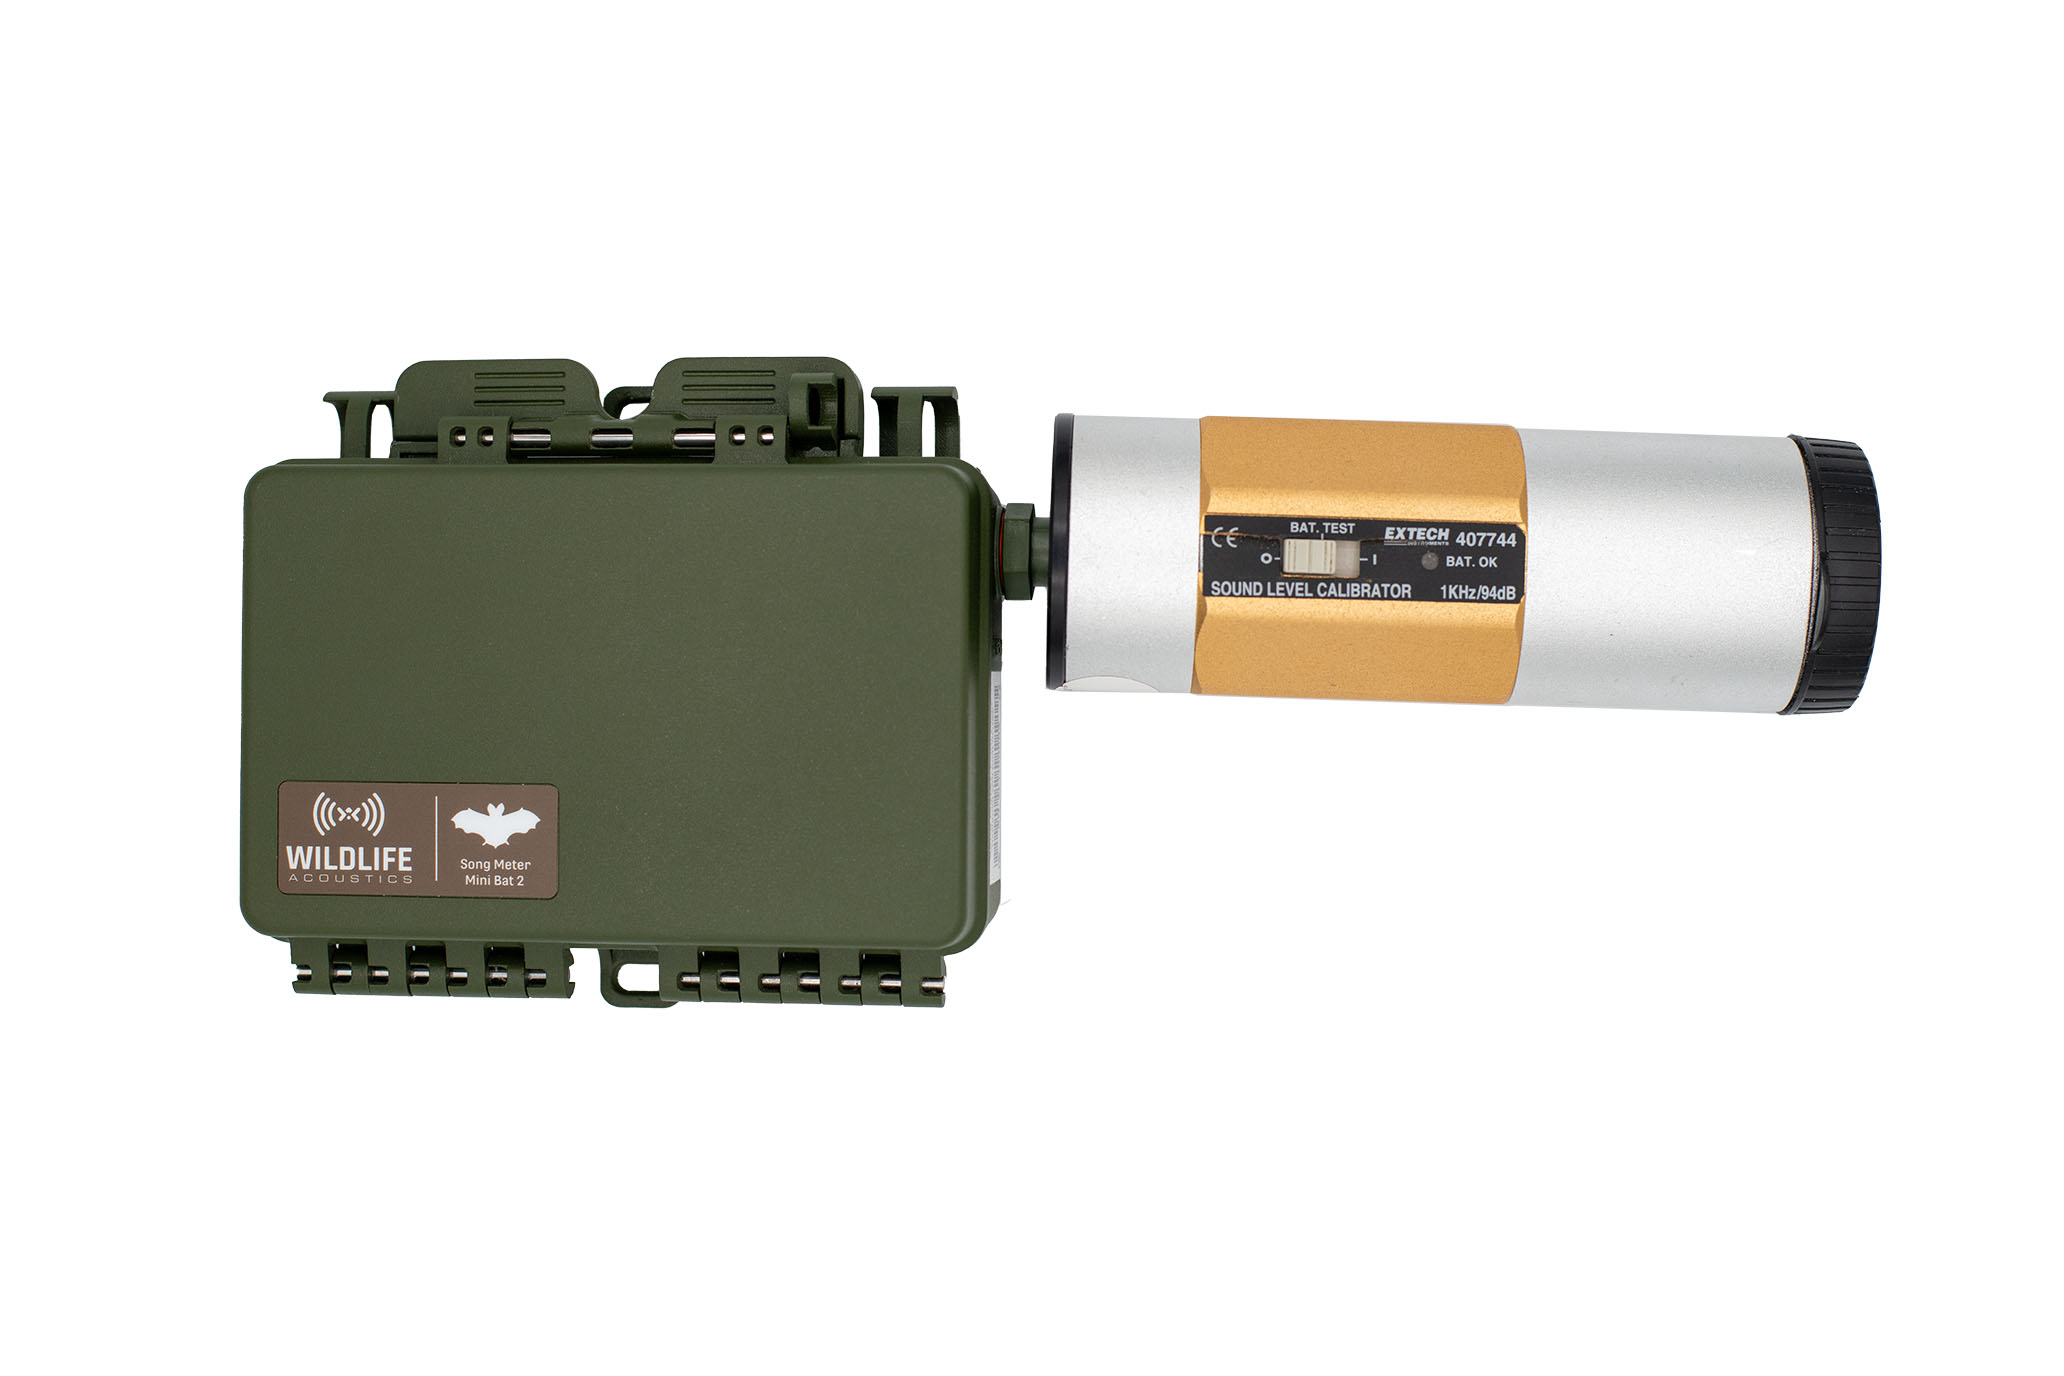
Turn the calibrator on.
If the calibrator has the option of multiple test frequencies and amplitudes, select 1 kHz and 94 dB SPL.
Observe the amplitude reading in the Test microphone window. If the value is higher than -16 dB, the microphone has passed and is ready to use. If the value is lower, the microphone has lost some or all of its sensitivity and should be replaced.
dBFS readings in the Test microphone window are negative numbers, so a "higher" value than -16 dB is one that is closer to 0 dB. For example, a reading of -10 dB would pass, while a reading of -20 dB would fail.
Weatherproofing
The Song Meter Mini Bat 2 is designed to work in all kinds of weather, and will not let in any water under normal circumstances. However, there are a few routine checks that should be done to make sure that your recorder is as weatherproof as it was when you received it.
Examine the red rubber gasket around the edge of the battery compartment. The gasket should be free of debris and tears.
Note that DEET, a common ingredient in insect repellent, is known to degrade the plastic used in the Song Meter Mini Bat 2 enclosure. When possible, avoid contact with insect repellent.
Some plant oils may also soften the recorder's rubber gasket over extended periods of exposure.
Ensure the bolt covering the optional microphone port on the right side of the recorder is tightened and undamaged.
Do not over-tighten the optional microphone or cover bolt. Doing so will distort the rubber O-ring gasket and allow water to enter the recorder.
If using the AA version of the Song Meter Mini Bat 2, ensure that the battery tray ribbons are not pinched between the two halves of the enclosure.
Ensure that all acoustic microphones have foam windscreens in good condition.
Windscreens may turn brown with long-term UV exposure, but they can be used until the foam begins to crumble.
Avoid pointing microphones directly upwards.
Mounting
Avoid putting strain on the Song Meter Mini Bat 2 enclosure by mounting it too tightly. This can distort the enclosure and break the seal, causing a gap that may allow water inside. Note that trees can sometimes grow rapidly enough to cause further strain on equipment that has been mounted on them.
Security
 |
The upper-left and upper-right corners of the Song Meter Mini Bat 2 enclosure feature loops through which a cable lock can be threaded to secure the recorder to a tree or structure. The diameter of the cable must be narrower than 0.420 in. (10.67 mm) to fit through these loops.
To keep the Song Meter Mini Bat 2 enclosure locked closed, a padlock can be inserted in the loop on the right side of the latch. The internal diameter of this padlock loop is 0.268 in. (6.81 mm). We recommend a padlock with a shackle diameter of 0.25 in. (6.35 mm). This size does allow some movement of the latch, but not enough that it compromises the IP67 weatherproof rating of the Song Meter Mini Bat 2 enclosure.
Warning
Do not use a padlock with a shackle thinner than 0.25 in. (6.35 mm). A thinner shackle will allow the latch to be undone partially or completely, allowing water to get in, or allowing the enclosure to be fully opened.
Note that damage to any part of the Song Meter Mini Bat 2 's plastic enclosure can compromise the effectiveness of these security features. If your recorder has been damaged, contact Wildlife Acoustics Support to arrange a repair.
Protecting Unused Acoustic Microphones
If you install the optional, second microphone, you may decide not to use it for every deployment. If this is the case, we do not recommend removing and reinstalling the microphone each time you change your recording configuration. The connections between the microphone and the Song Meter Mini Bat 2 were not designed with repeated stress in mind, and repeatedly removing and reinstalling a microphone may damage these connections.
In most situations, it is fine to leave the optional microphone installed, even if it will not be used for a given deployment. If you wish to provide an extra layer of protection against animals or extreme weather, you can install an optional Stub Mic Cover. The Stub Mic Cover is a black, vinyl cap that fits over the acoustic microphone in place of the foam windscreen.
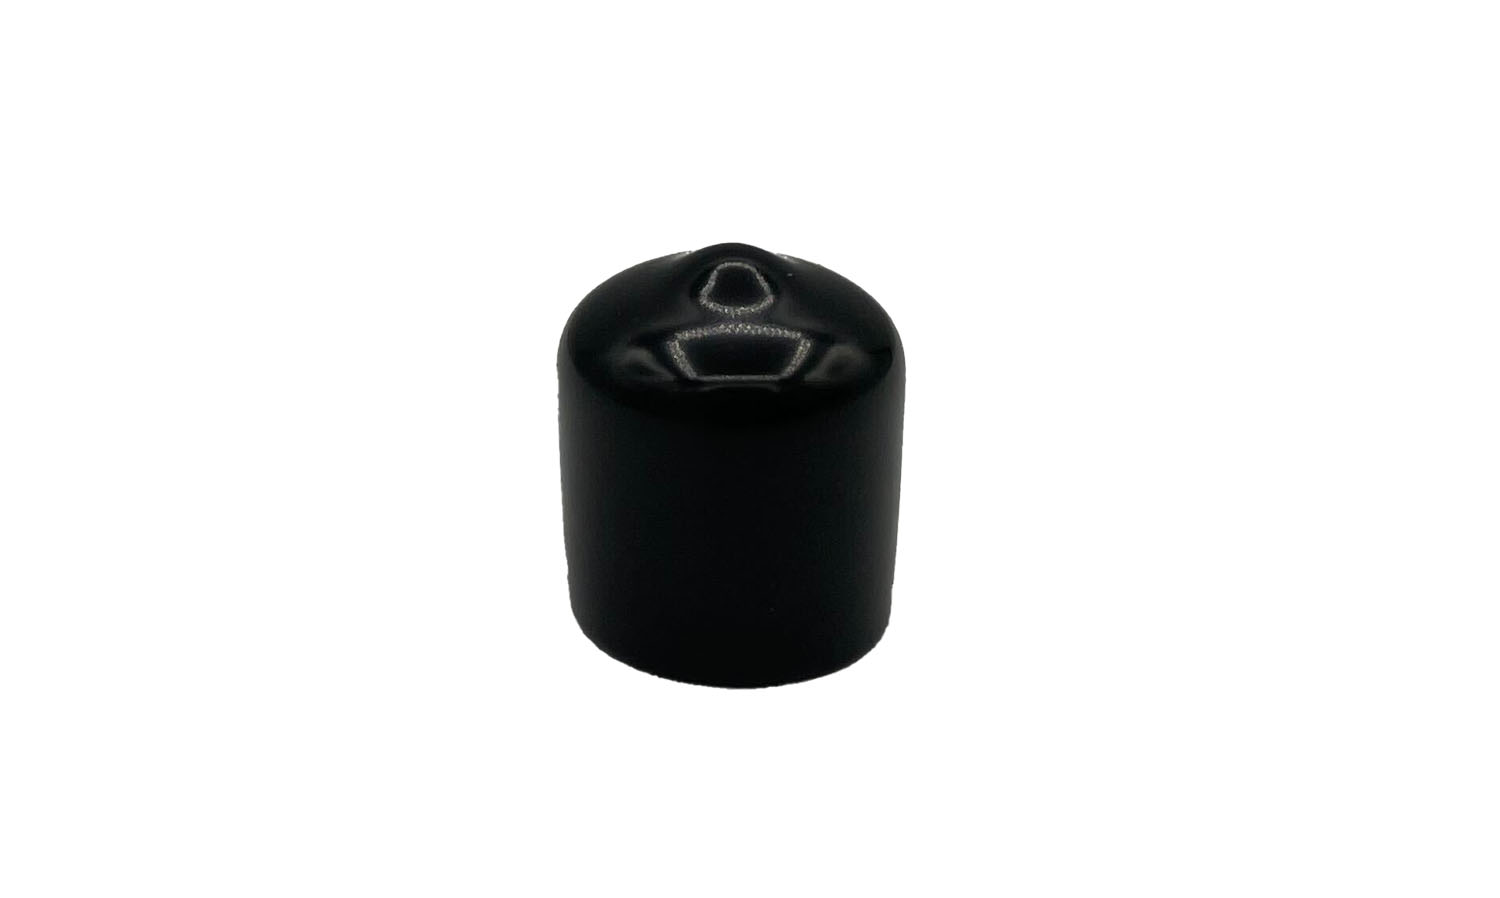 |